CodeScene CLI tool
The CodeScene CLI is a command-line tool which performs the same checks as the PR integration, but locally - on non-committed, staged changes or between select branches.
A few highlights of the tool:
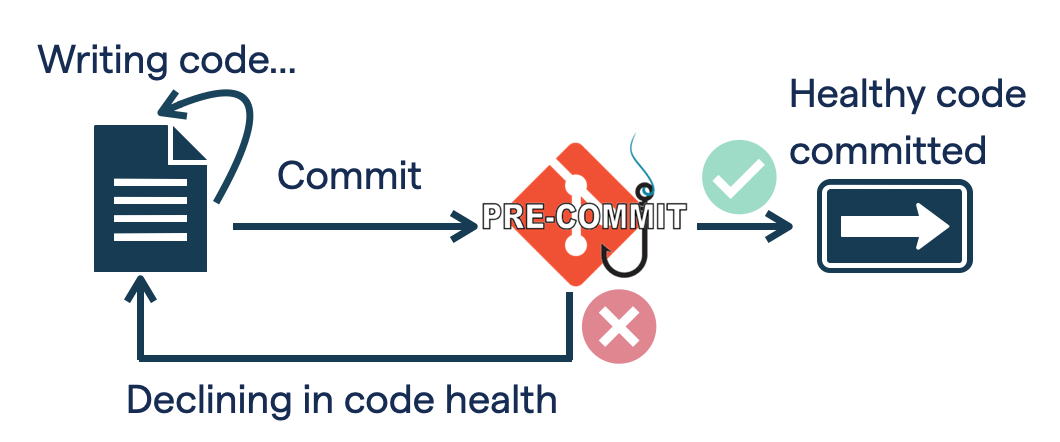
Automated check via Git pre-commit/push hooks. Push clean PRs.
Integrate with any code editor.
Integrate into CI/CD pipelines for teams doing Trunk Based development
Installation
Linux, macOS and Windows (if WSL)
The install script will download the binary, move it to ~/.local/bin and make it executable. If ~/.local/bin is not in the user’s PATH, it will be added.
It works if your shell is one of: bash, zsh or fish
curl https://downloads.codescene.io/enterprise/cli/install-cs-tool.sh | sh
Windows (powershell)
The powershell script downloads the windows binary, moves it to $env:USERPROFILE\AppData\Local\Programs\CodeScene and makes it executable.
Invoke-WebRequest -Uri 'https://downloads.codescene.io/enterprise/cli/install-cs-tool.ps1' -OutFile install-cs-tool.ps1
.\install-cs-tool.ps1
Note, on non-server editions of Windows, the script execution policy is set to Restricted by default, and script execution is disabled. It can be enabled with:
Set-ExecutionPolicy RemoteSigned
This allows for the execution of trusted scripts downloaded from the internet, and all local scripts. In our case the script is considered a local file.
Manual installation
The binaries are also available for manual installation. Just download the binary for you platform and make it executable.
Platform specific notes
MacOS binaries are not signed, thus you have to manually move them out of quarantine using
xattr -dr com.apple.quarantine <binary>.Windows users might have to set the script execution policy manually as mentioned above:
Set-ExecutionPolicy RemoteSigned
Client setup
The CLI tool requires a user with a Technical role - see Users and Roles. The user should create a Personal Access Token at https://your.codescene.com/configuration/user/token.
Then set your environment variables as follows:
export CS_ONPREM_URL=<https://your.codescene.com>
export CS_ACCESS_TOKEN=<your-token>
Or in Windows PowerShell:
$env:CS_ONPREM_URL = '<https://your.codescene.com>'
$env:CS_ACCESS_TOKEN = '<your-token>'
Here are the main ways to set environment variables in Windows Command Prompt:
Temporary (for current session only):
SET CS_ACCESS_TOKEN=<your-access-token>
SET CS_ONPREM_URL=<https://your.codescene.com>
Permanent (using setx command):
SETX CS_ACCESS_TOKEN=<your-access-token>
SETX CS_ONPREM_URL=<https://your.codescene.com>
Note: Changes made with SETX require reopening Command Prompt to take effect
You can set environment variables in Windows through the System Properties dialog. Here’s how to access it:
Right-click on “This PC” or “My Computer”
Click “Properties”
Click “Advanced system settings”
Click “Environment Variables” button near the bottom
Or the faster way:
Press Windows key + R
Type “sysdm.cpl”
Go to “Advanced” tab
Click “Environment Variables”
Off-line use
Once the CLI tool has sucessfully authenticated with the server once, it can be used offline until the end of the server’s license period. The off-line license is stored in the directory defined by CODESCENE_HOME environment variable. If you want to run offline in builds such as GitHub actions you’ll can copy this folder into the docker image.
If environment variable CODESCENE_HOME is not set:
in Windows it is
$APP_DATA/Codesceneelse it is
.codescenedirectory in user home directory